
How to Print Planner Inserts at Home Without Wasting a Stack of Paper
How to Print Planner Inserts at Home Without Wasting a Stack of Paper
A one-sheet test can answer most printing questions before the full stack begins.
Summary
Home printing becomes much less wasteful when we slow down at the beginning. This guide walks through the order that matters: understand the PDF, print at actual size, test one sheet, check the duplex direction, and only then trim and punch the final pages.
Journal article
The first page comes out looking almost right.
The margins seem tidy. The lines are clear. Then the ruler comes out, and the insert is a few millimetres too small. Or the front is perfect, but the back is upside down. By the time we notice, the printer may already be halfway through the stack.
Printing planner inserts at home is a process with several small decisions hidden inside one familiar button. Paper size, scale, orientation, duplex direction, and trimming order all affect the result. Taken in the right order, one ordinary test sheet can do most of the work.
This is the method we use at the studio when a printable needs to move from screen to paper without drama.
Begin with the file, not the printer
Before opening the print window, read the instructions that came with the download. Look for three things: the finished insert size, the paper size the PDF expects, and whether the pages are arranged one per sheet or two per sheet.
These are not always the same size. An A5 insert, for example, may be supplied on an A4 sheet with two pages side by side. A personal-size insert may sit inside a larger US Letter page with trim marks around it. Choosing the finished size as the printer paper size can change the layout before printing even begins.
Open the original PDF in a PDF reader rather than printing a browser preview, screenshot, or image saved from the listing. Those versions can introduce their own margins or scaling. If the creator has supplied separate A4 and US Letter files, use the one that matches the paper in the printer tray.
Keep the scale at 100%
This is the setting that causes the most quiet trouble.
In Adobe Acrobat, Actual size prints the page without scaling. Fit can reduce or enlarge the page to match the printer's printable area. That is helpful for many documents, but not for a planner insert whose final dimensions need to be precise. Start with Actual size or 100%, unless the file's own instructions explicitly say otherwise.
Do not rely on the preview alone. A page can look centred and still be scaled. After the first test print, measure the finished size, a reference box, or the distance between trim guides.
There is one exception worth knowing. Most home printers cannot print to the very edge of every paper type. If a design extends beyond the printable area, part of it may be clipped at Actual size. Follow the creator's borderless-printing instructions if they provide them, and check that your printer supports the chosen paper and borderless size. Changing to Fit may save the artwork from clipping, but it will also change the insert's dimensions.
Let one sheet be the test
A test sheet is not wasted paper. It is the sheet that protects the rest of the stack.
Use ordinary printer paper first, even if the final inserts will use a heavier stock. Choose one page with lines, boxes, or trim marks that are easy to measure. Check its scale, centring, orientation, and edges.
Before testing the reverse side, draw a small pencil arrow in one corner of the sheet. Point it toward the top edge and note which side is facing up when the paper enters the tray. That tiny mark turns an invisible printer path into something we can follow. If the back comes out upside down, we know whether to change the duplex setting or rotate the sheet before feeding it again.
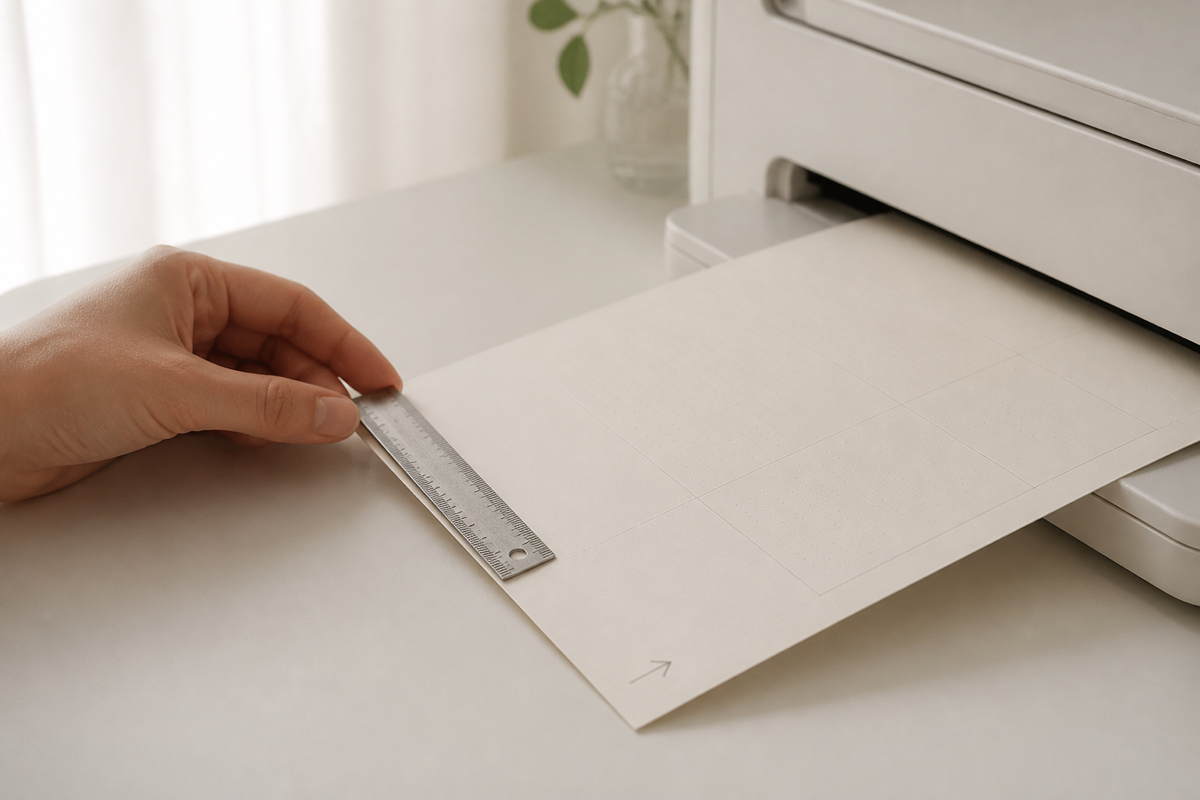
Keep this marked sheet near the printer. It can become a simple map for the next time, especially if the tray loading direction is easy to forget.
Treat duplex as a direction, not a universal button
Double-sided printing is where otherwise careful guides can become confusing. Printer menus usually offer a version of flip on long edge and flip on short edge, but the correct choice depends on the PDF's orientation and how the pages are arranged.
For a portrait page printed one per sheet, long-edge binding is common. For two portrait inserts arranged across a landscape sheet, short-edge binding is often the correct choice. This is the pattern described in printable-planner guides from 8Lotus and May Paper Co., but it is not a rule to apply blindly. Brother's duplex-printing guidance shows why: the available binding directions change with portrait and landscape orientation.
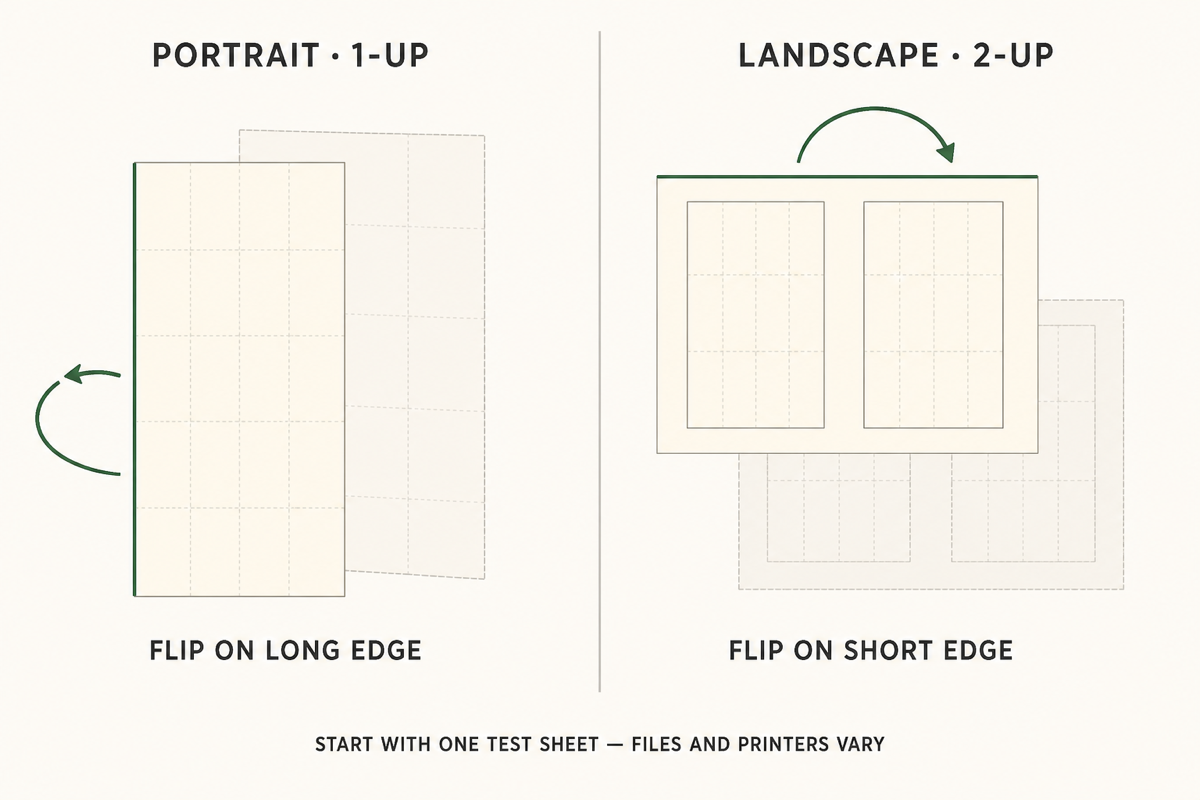
Let the file instructions come first, then confirm them with one front-and-back pair.
If the printer does not support automatic duplexing, the same test still works. Print one front, mark its top edge, and feed it back through for the reverse. Printers differ in whether the printed side returns face up or face down, so avoid committing to every odd page until one pair is correct. Once it is, write the loading direction on the test sheet.
Trim only after the print is right
Trimming cannot repair a page that was printed at the wrong scale. It can only make that error permanent and harder to diagnose.
Finish the printing checks first. Confirm the final dimensions, make sure the front and back are aligned well enough for the design, and place the pages in order. Then follow the supplied crop or cut marks. A paper trimmer is convenient; a metal ruler, cutting mat, and sharp craft knife can be just as accurate when used carefully.
Keep the trim guides visible for as long as possible. The cutting sequence depends on how the marks are arranged, so the file creator's diagram should take priority. After one insert measures correctly, use it as a reference for the rest.
Punch holes last. Once holes are added, there is less room to correct a shifted edge or reverse the page order.
Save the good paper for the confirmed settings
Paper recommendations are useful, but no single weight suits every home printer. A stock that feels lovely in a planner may be too heavy for a particular duplex path or rear tray. Check the printer manual for supported paper types and weights before buying a large pack.
The calmer approach is to separate testing from finishing. Use inexpensive paper to solve scale and direction. Then load only a small number of final sheets, select the correct paper type in the print menu, and print a second test on the chosen stock. Heavier paper can feed differently, so this last check is still worth making.
Once that sheet is right, the rest of the stack is no longer an experiment.
A quiet troubleshooting list
If the insert is too small, check for Fit, Shrink, or Scale to printable area. Return to Actual size or 100% and confirm the PDF's intended paper size.
If an edge is clipped, check that the loaded paper matches the file and that the design sits inside the printer's printable area. Borderless printing is a printer feature, not only a PDF setting.
If the reverse is upside down, change the long-edge or short-edge binding direction and test the same marked sheet again.
If the page shifts or gains unexpected margins, print from the original PDF in a PDF reader and confirm the orientation in both the document and printer settings.
If the final cuts are uneven, stop before punching. Recheck the finished dimensions and the trim guides on a single page.
One page before the stack
The most useful home-printing habit is not a special tool or a perfect paper. It is the decision to let one sheet answer the questions first.
Read the file. Match the paper. Keep the scale at 100%. Mark the direction. Test one front and back. Trim and punch only after everything else is settled.
The process may take a few extra minutes at the beginning. In return, there is less paper in the recycling tray, less uncertainty at the printer, and a finished set of inserts that fits the planner as it was meant to.